Friday, February 27, 2015

Handmade Paper Flower Magnets, LOVE!

The Challenge: Handmade Flowers and/or Recycled Items

Though this challenge should have been a cinch for me, as I recycle (hoard) everything in hopes that I can incorporate it in my art, the creativity part was the real challenge.

I remembered watching a video by Jennibellie, where she made the cutest ever recycled flowers. They are so easy, and so fun to create and decorate that I thought I would show you a project I made using the flowers I made.


Refrigerator Magnets

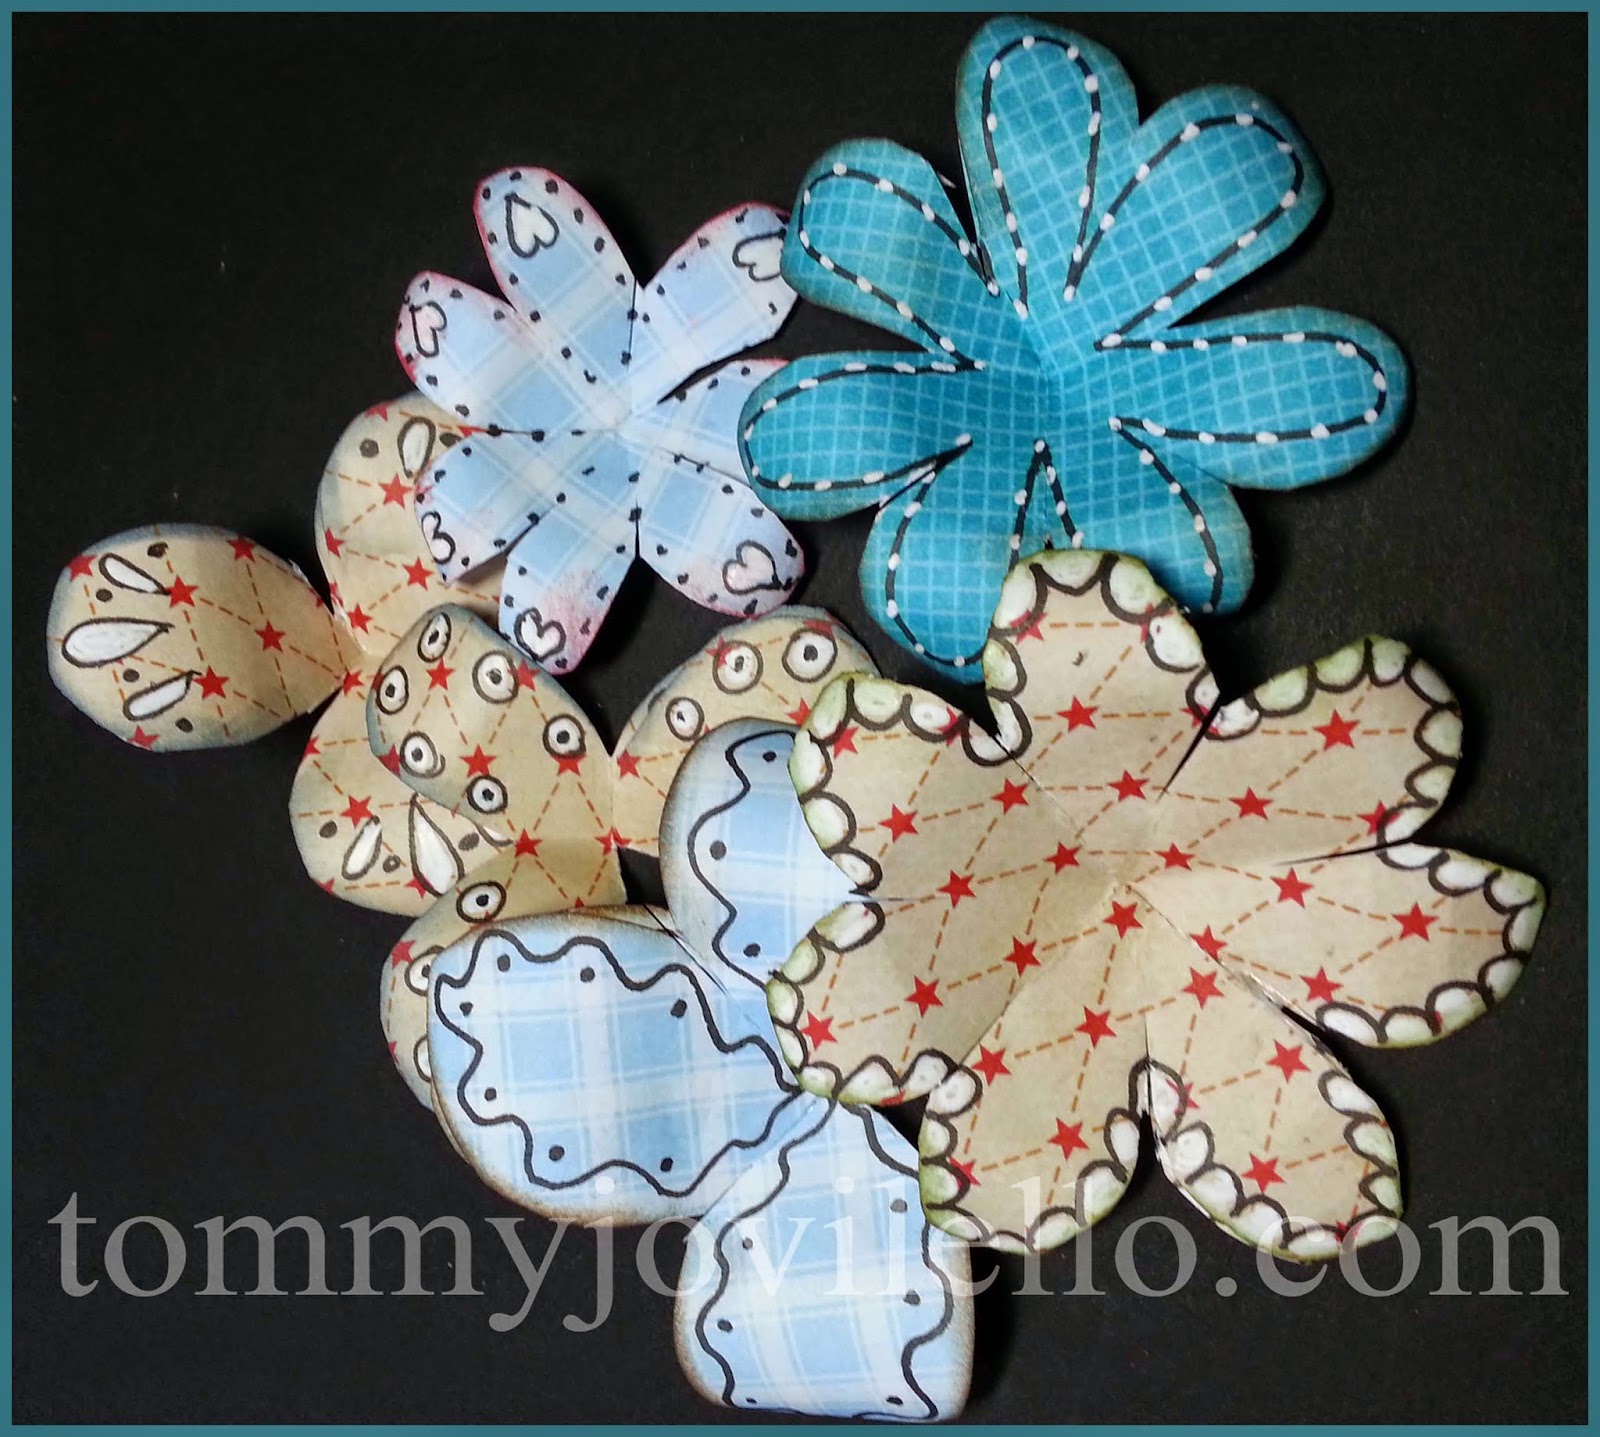
 I gathered about 5 different scraps of paper from my working pile and following the video instructions I  cut various shapes and sizes.


Using a Signo white pen and a Fudball black pen, I outlined the petals with various designs.


I distressed the edges with different colors of Tim Holtz Distress Inks. I wasn't very careful, as I was just trying to add a little color and dimension to the edges.


The next step involved cutting in between the petals a little and then gluing one petal over the one next to it; creating more dimension. I curled the edges of the petals back using the closed blades of the scissors and my thumb.


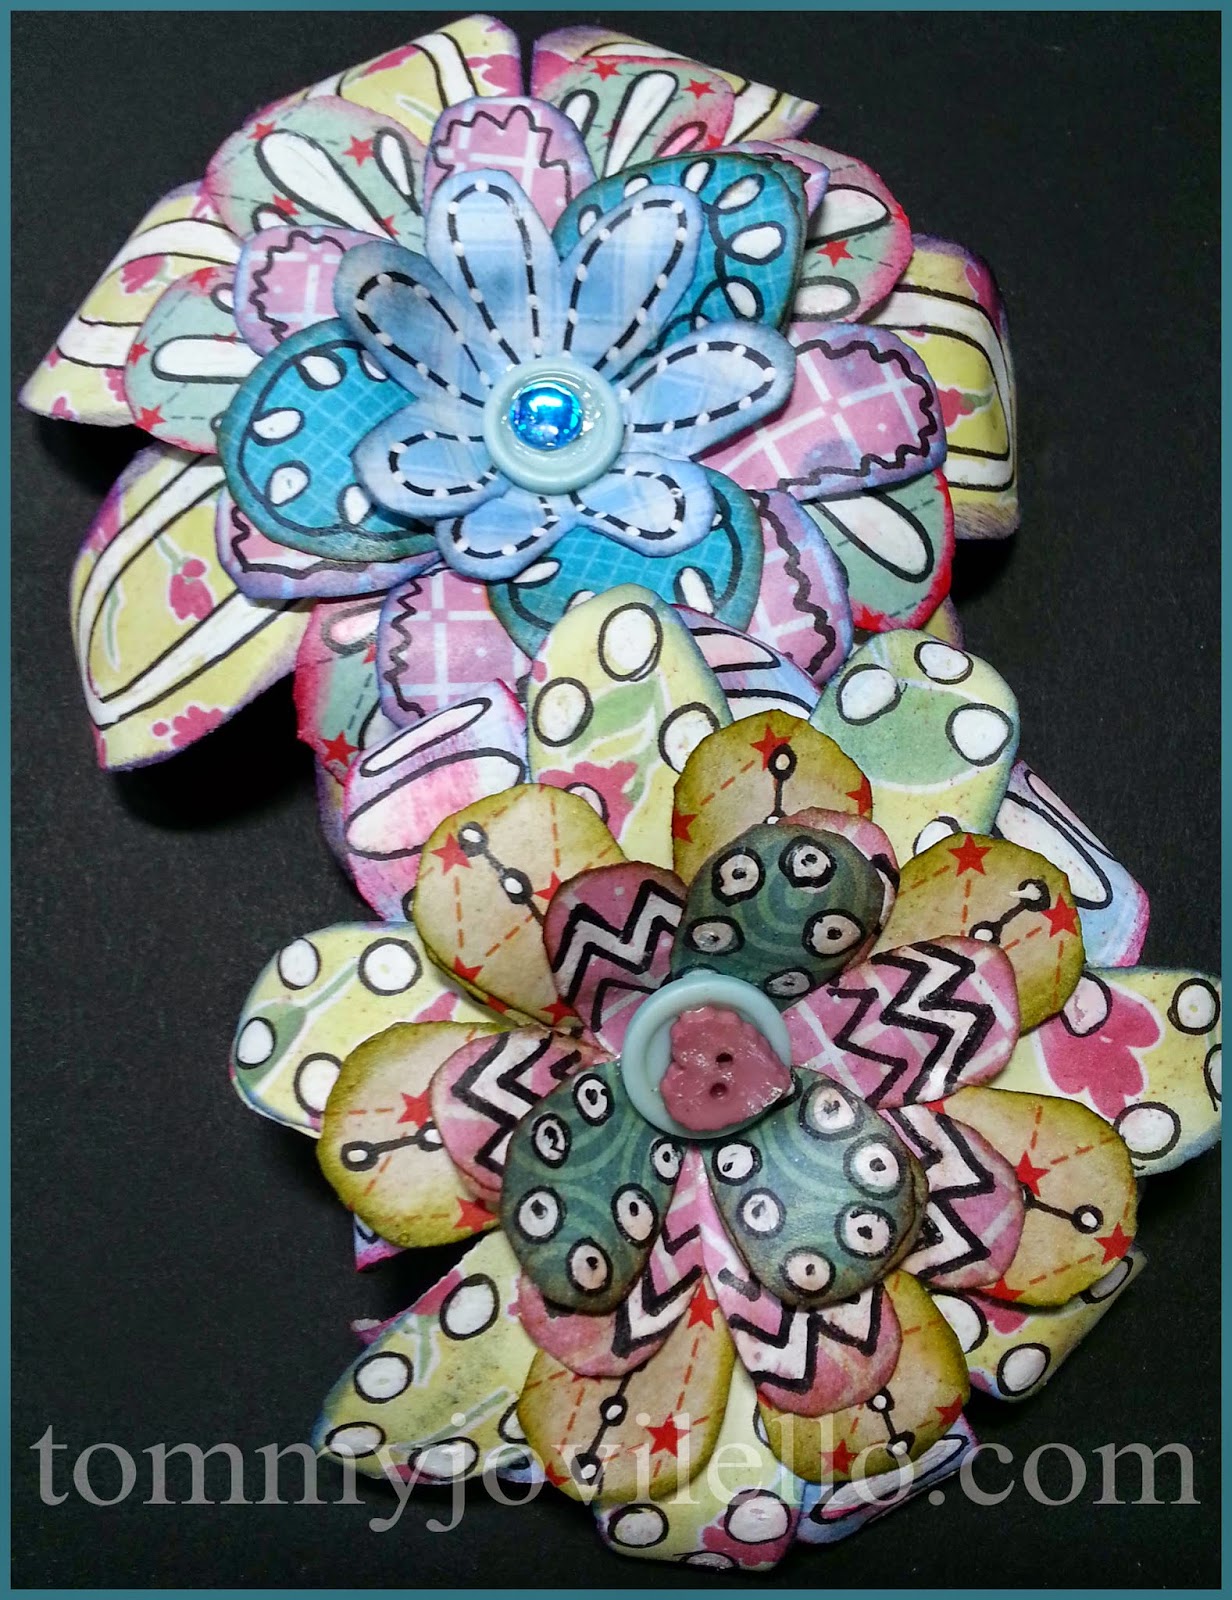
Now you layer the petals until you like the result (this part can take me hours...haha). Once I figure that out, I use Aileen's Tacky glue to glue the layers on top of each other at the centers.


Almost done... I have to decide which embellishment will adorn the centers of the flowers. Again, this task does not happen quickly and I end up with buttons,   beads, bling and mini flowers all over my workspace :) For this one, I selected one of the mini flowers from the Frosted Designs kit "Rustic Beauty"


For these others, I used buttons and bling for the centers.


This is how you make the flowers. I could make these flowers by the dozen as it is so much fun and I love the result. 


Can you imagine all the different ways you could incorporate these funky flowers in your arts and crafts?

I had an idea of how to use a few of mine and I want to show you how simple it was. 

How many of you get the new phone books with advertising magnets in them. I actually use them on my fridge. Well, why not turn them into art for your fridge?
Here is a magnet that's been on my fridge for a while.


I  cut this magnet into two circles. I traced the circles on chip board (3 pieces for each finished magnet). Because the flowers are dimensional, I had to add a little depth to the magnets. I glued the chipboard circles together with E6000 and then glued the magnet circles to them. Then, I glued these pieces to the back of the flowers.


The only thing left was to apply Mod Podge to the fronts making is possible for you to dust the petals with a damp cloth.


Voila!!!! Refrigerator Magnets


Thursday, February 12, 2015

Treasure Box - My First Attempt At Grunge and Steampunk

As you all know, my style of art is across the board as it changes by my mood. It can change by what supplies I have on hand or by an inspiration piece of another artist.

The one thing that remains constant is my desire to try different techniques and to learn the diversity of how different mediums can be used.

I love treasure boxes and have "a few." So, what better project than to try to alter one using new style and techniques and see what I can come up with?

I received a box of candy for Christmas from a neighbor and knew that I wanted to save it for a future project. Yay, glad I did as it was perfect for this project.


I painted on two coats of gesso to mask the slickness of the original coating.


Using the Heidi Swap Flower Doily Stencil and modeling paste, I randomly covered sections of the box to give it some texture. 


To begin adding color, I sprayed various colors of  Dylusions and Perfect Pearls. For just a minute, I wanted to paint gesso all over it as the colors seemed so bright and out of my element, but I decided that this is part of the learning process and trudged on.


I noticed that the parts of the box that were not textured with the modeling paste (the corners in particular) seemed 'lacking', for a better word, and I wasn't sure how to get those spaces to feel coherent with the rest of the box.


As I was wiping up the ink overspray, I realized that the paper towel I was using was obviously the same colors as my box. 


And, because in Mixed Media anything goes, I began tearing off pieces of the paper towel and adhering them to those empty spaces with some gel medium. I LOVED IT!


Now that my box was covered in texture, I had to decide how to decorate the lid.
I gathered items from my stash, my kitchen junk drawer, and my Frosted Designs "Rustic Beauty" kit. I arranged, rearranged and changed them to see what was appealing to my eye.


After finally deciding which elements I would use, I painted all the hardware type pieces with gesso, sprayed them with inks and rubbed them with metallic paints. I used a piece of the number plate paper that came in the Frosted Designs "Rustic Beauty" kit. I also decided to use an old paper bag flower that I made a while ago (top left flower) in lieu of one of the kit's paper flowers. I added pearl beads as centers to some of the flowers and blue bling, of course :)


I was so excited to see my first grungy, steampunky piece completed. Woo Hoo, I still haven't gessoed over it. 


Actually, I am very proud of it. I want to try more of these, so I will search my house for more boxes... a girl on a mission... haha!